

Dreaming of a coffee bar but stuck in a rental where drilling a single hole can cost you your security deposit? You’re not alone. Millions of renters in US apartments quietly accept a bare countertop because “it’s not really my place.” Here’s the good news: these renter friendly coffee bar ideas need zero screws, zero anchors, and zero permission slips from your landlord.
This guide covers 12 no-drill coffee bar ideas — each with a realistic cost — that look intentional, hold up to daily use, and come down cleanly on moving day. Every idea below has been vetted for apartment life: lightweight, damage-free, and landlord-approved.
The Renter’s Rulebook (Read This First)
Before the ideas, three rules that keep your deposit safe:
- Nothing screwed into the wall. No anchors, no studs, no “just one tiny hole.” Tiny holes add up at move-out.
- Test adhesives on a hidden spot first. Paint quality varies wildly between apartments. A cheap flat-finish paint will peel with adhesive strips; most decent satin/eggshell paints won’t. Test behind the fridge or inside a cabinet first.
- Respect weight limits. Command hooks and adhesive shelves have real ratings. A hook rated for 4 pounds holding 4 pounds of mugs is fine; the same hook holding a shelf of syrup bottles is a crash waiting to happen.
Follow those three, and you can build something genuinely beautiful.
12 No-Drill Renter Friendly Coffee Bar Ideas
1. The Rolling Bar Cart — The Renter’s Coffee Bar in One Piece
Nothing says “I meant to do this” like a dedicated cart. A three-tier rolling bar cart (the IKEA RASKOG and its many Target/Walmart cousins) is the single easiest coffee bar for a rental: it needs no assembly beyond a screwdriver, rolls wherever you need it, and moves with you.
Style it bottom-up: coffee maker and mugs on top, beans and syrups in the middle, backup supplies and a basket of napkins below. A small rug or runner underneath grounds it visually — carts on bare hardwood can look temporary, but a rug says “zone.”
Cost: $30–$60 new; $10–$25 thrifted or from Facebook Marketplace.

2. The Leaning Ladder Shelf — Built-In Look, Zero Holes
A leaning ladder shelf does something magical: it reads as custom millwork while touching the wall with nothing more than rubber feet. These slim shelves lean at a slight angle, which keeps them stable without mounting, and the graduated shelves are perfect for coffee gear — machine on the deepest bottom shelf, mugs and canisters above.
For extra stability (and peace of mind on upper floors), use adhesive anti-tip furniture straps instead of the screw-in kind that come in the box. They stick to the wall and the back of the shelf and peel off cleanly at move-out.
Cost: $40–$80 depending on size and finish.
3. Command Hooks for Your Mug Collection
Those bare walls above your coffee station are wasted space. A row of medium Command hooks turns them into a mug display for under $10 — no drilling, no anchors, and they remove with a pull-tab that stretches the adhesive instead of ripping paint.
Tips that matter: clean the wall with rubbing alcohol first, press the strip firmly for 30 seconds, and wait a full hour before hanging anything (yes, really). Hang one mug per hook, and keep each hook at or below its rated weight. White hooks on a white wall all but disappear.
Cost: $5–$10 per pack of hooks.
4. The Tension Rod Under the Cabinet — A Hidden Mug Rail
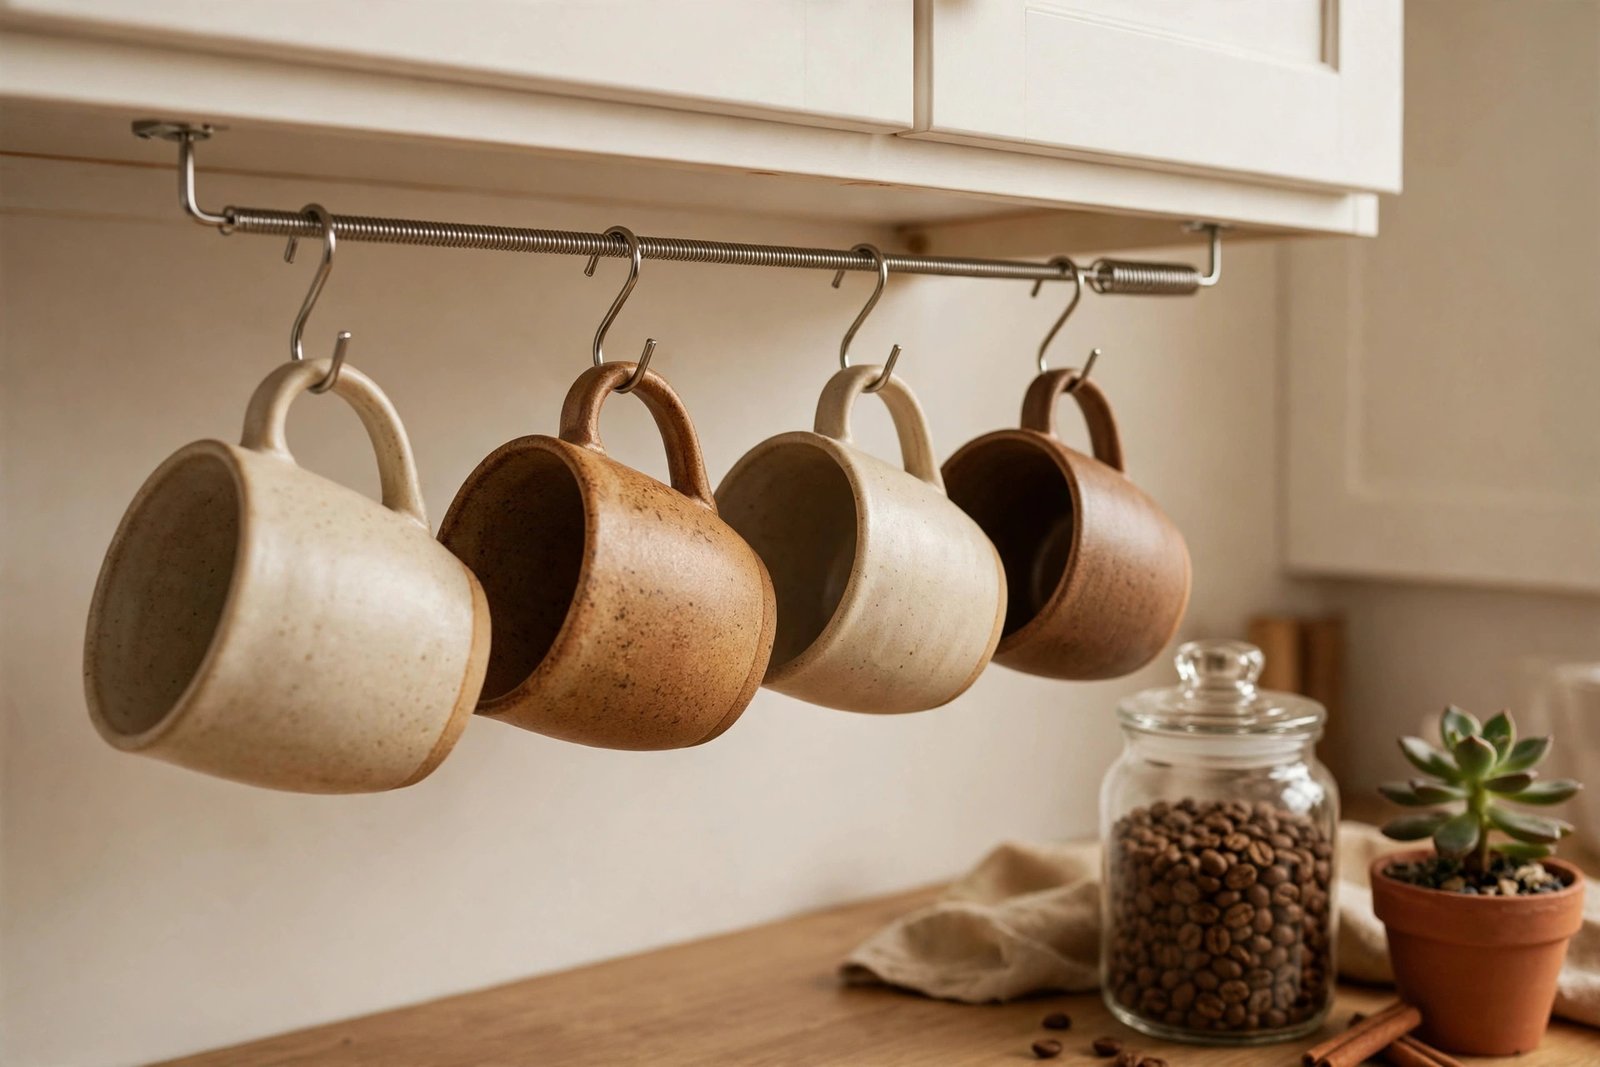
Here’s a trick most renters never think of: a short spring-loaded tension rod wedged under your upper kitchen cabinets, with S-hooks hanging from it. Slide it back a few inches so it’s hidden from straight-on view, and you’ve got a mug rail that cost almost nothing.
This works best for lightweight mugs (under about 12 ounces each) and needs cabinets at least a couple of inches apart — measure the gap before you buy the rod. Pair it with our coffee bar organization ideas to make every inch count.
Cost: $8–$15 for the rod plus S-hooks.
5. Adhesive LED Strip Lights — Instant Café Glow
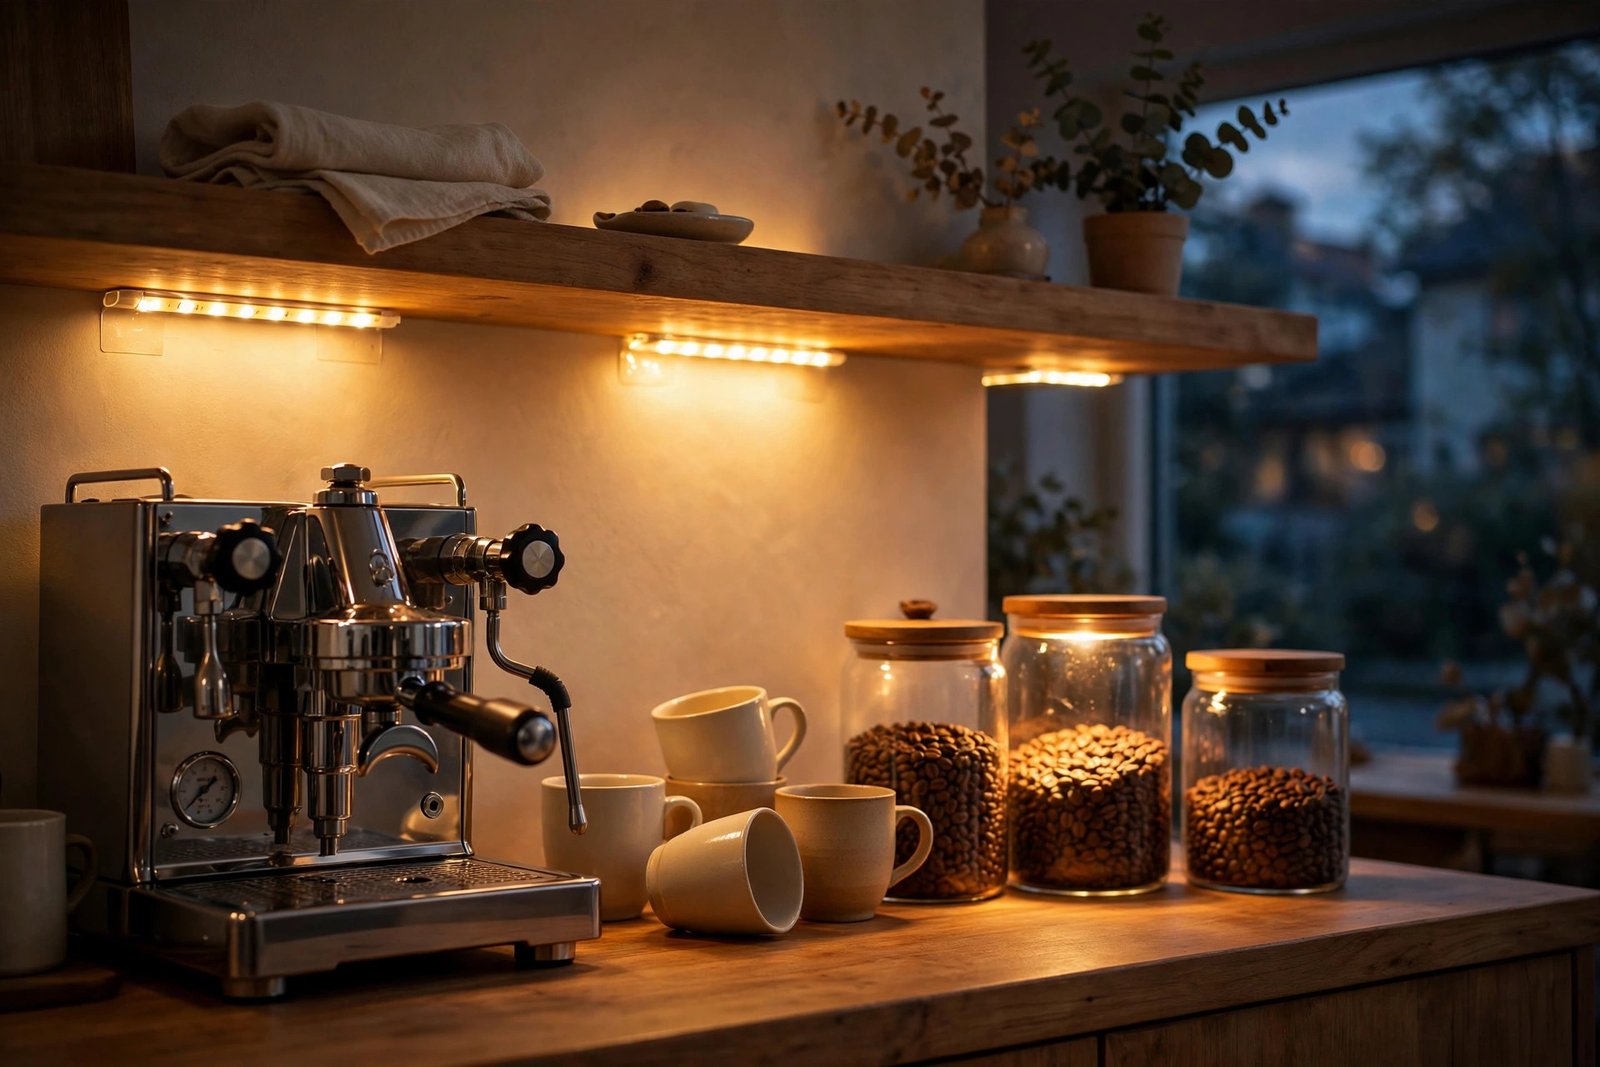
Overhead rental lighting is the enemy of cozy. A USB- or battery-powered LED strip stuck under a shelf or cabinet instantly gives your coffee bar that warm café glow — and since it mounts with adhesive, it comes down in seconds.
Look for warm-white (2700K) strips with a remote or motion sensor so you’re not fumbling for a switch every morning. The battery-powered kind with a motion sensor is ideal: walk up, lights fade on, feel like a barista. If the adhesive backing ever feels weak, stick the strip to a thin piece of painted wood trim first, then attach the trim with Command strips — double the holding power, zero extra damage.
Cost: $10–$18 for a good 6-foot strip.
6. Over-Cabinet Hooks — Storage on Every Door
Every cabinet door is a missed opportunity. Over-cabinet hooks (S-shaped brackets that hook over the door top) hold mugs, small baskets, or a towel on the inside of a cabinet door — completely invisible when closed.
The renter detail most people miss: put small felt pads on the contact points so the metal doesn’t scuff the door’s paint or finish. And keep the weight modest — cabinet hinges aren’t designed to carry a gallery of ceramic.
Cost: $8–$12 for a set.

7. The Freestanding Baker’s Rack — A Full Station, No Wall Needed
If you have even 24 inches of open wall, a freestanding baker’s rack is the closest thing to a built-in coffee bar a renter can get. The lower shelf holds your brewer, the middle shelf holds daily mugs and canisters, and the top racks display the pretty stuff. Many models include hooks and a wine-glass rack that double perfectly for mugs and pour-over drippers.
Baker’s racks are the heavy-lifting option here — check the weight rating and don’t put a full espresso machine on a rack rated for 50 pounds per shelf. This is the pick for renters who want the whole café look without negotiating with a landlord.
Cost: $50–$90 from Amazon, Walmart, or Target.

8. The Over-the-Door Organizer on the Pantry Door
That clear plastic over-the-door shoe organizer? In a coffee bar, it becomes a syrup and pod headquarters. Hang it inside the pantry door nearest your coffee station: one row for syrup bottles, one for tea bags, one for filters and pods, one for biscotti and snacks. Everything visible, everything reachable, and the door hides it all when guests come over.
Choose a fabric organizer over a rigid plastic one — fabric conforms better and won’t crack if the door gets bumped. If your pantry door is hollow-core, use hooks that distribute weight along the top rather than point-loading one spot.
Cost: $12–$20.
9. Adhesive Mini Shelves for Syrups and Spices
Small acrylic or bamboo shelves with strong adhesive backing are perfect for the lightweight stuff: syrup bottles, a sugar jar, a tiny plant. Keep them small (under 12 inches wide) and light (a few pounds max) — these are for display items, not your espresso machine.
The secret to making these last: mount them on smooth, non-textured surfaces. Adhesive loves flat paint and tile; it hates orange-peel texture and rough plaster. And always mount with the included adhesive rated for the weight — doubling up strips from a different brand is how things end up on the floor at 2 a.m.
Cost: $10–$18 per shelf.
10. The Countertop Tiered Riser — Double Your Surface
A small bamboo or metal tiered shelf that sits on the counter doubles your coffee bar’s usable surface without touching the wall. Machine on the bottom, mugs and canisters on top, and suddenly a 24-inch counter feels like a full station.
This is the best $20 a renter can spend on coffee storage. It’s also the most move-friendly item on this list — it goes from counter to box in ten seconds, no adhesive to remove, no patching to do.
Cost: $15–$25.
11. The Tension Curtain Rod Backdrop — Define Your Zone
In an open-plan apartment, a coffee bar can look lost. Fix it with a spring tension rod spanning an alcove or a shallow nook, hung with a linen curtain panel behind your setup. It creates a “wall” where there isn’t one, hides clutter, and costs less than a dinner out.
This also works brilliantly for hiding ugly open shelving or an awkward under-stair corner. Choose a curtain close to your wall color and it reads as architecture, not a hack.
Cost: $15–$25 for the rod and a panel.
12. The Leaning Menu Board — Café Character Without Nails
Every great coffee bar needs a menu board, and renters don’t need nails to have one. A small chalkboard or framed print simply leaned against the wall behind your setup gives you the café vibe with zero commitment. Lean it at a slight angle with a book or a wooden easel behind it for stability.
Update the board seasonally — your drink menu in fall, a quote in spring — and it becomes the piece guests always comment on. For frames, lean larger ones and hang smaller ones with adhesive strips; the mix looks more collected than a straight grid anyway.
Cost: $10–$20 for a chalkboard or thrifted frames.
What NOT to Do: Lease-Violation Traps
Knowing what to avoid matters as much as the ideas above. These are the moves that actually cost renters money at move-out:
- Drilling into tile backsplashes. Cracked tile can’t be patched — your landlord replaces the whole run and bills you. This is the most expensive “oops” on the list.
- “Just one hole” for a wall anchor. Most leases prohibit wall-mounting furniture or shelving, period. One hole is still a lease violation, and spackle doesn’t fool a walkthrough with a flashlight.
- Overloading adhesive on cheap flat paint. Builder-grade flat paint peels off drywall with adhesive strips. Test first; if it peels, stick to furniture-based ideas (carts, racks, leaning shelves).
- Loading over-cabinet hooks too heavily. Warped cabinet doors from 15 pounds of mugs are a real charge at move-out. Light items only.
- Hanging anything from sprinklers, smoke detectors, or pipes. This is a lease violation and a fire-code issue. Don’t do it, even “temporarily.”
- Mounting shelves with drywall anchors “because it’s sturdy.” Sturdy is not the point — the hole is. There is always a freestanding alternative.
When in doubt, ask. A quick email to your landlord (“I’d like to use removable adhesive hooks, no drilling — okay?”) creates a paper trail that protects you.
How to Make It Look Built-In (Without a Single Hole)
The difference between “stuff on a cart” and “a coffee bar” is styling. Five tricks make a no-drill setup look custom:
- Corral everything on a tray or runner. One wooden tray under your machine, beans, and mugs turns scattered items into a station. It’s the single biggest visual upgrade in this entire guide.
- Match your palette to the kitchen. If your cabinets are white and your counters are gray, lean into wood and brass accents. A cohesive 2–3 material palette reads as intentional.
- Hide the cords. Adhesive cable clips (the tiny clear kind) route brewer cords along the back of a shelf or cart leg. Visible cords scream “temporary”; hidden ones whisper “built-in.”
- Go full height. Style from counter to ceiling: machine below, mugs at eye level, a leaning frame or curtain above. Vertical styling is what makes built-ins look built-in.
- Repeat materials. Two wooden elements, two brass elements, one green plant. Repetition is the cheapest way to look designed.
For more on the styling side, see our guide to cozy coffee corner décor — most of those ideas are renter-safe by default.
Moving Day: Taking It All Down (and Getting Your Deposit Back)
The beauty of a no-drill coffee bar is move-out day. Here’s the teardown order:
- Photograph everything at setup. When you first build the station, take photos of the walls and surfaces underneath it. If your landlord claims damage later, your timestamped “before” photos win the argument.
- Remove adhesive with heat, not force. Warm a hair dryer on each adhesive strip for 20–30 seconds, then pull the tab slowly along the wall (never straight out). The stretch releases the bond instead of the paint.
- Fishing line for shelves. Slide unflavored dental floss or fishing line behind adhesive shelves in a sawing motion to separate them cleanly.
- Goo Gone for residue. A dab on a cloth removes leftover adhesive. Test on a hidden spot first — some finishes don’t love solvents.
- Keep the boxes. Fold and store the cart or rack’s original box. Reassembled furniture with all its parts reads as “cared for” during a walkthrough.
Do all five and your move-out will be the easiest part of the lease.
FAQs
Can I put up a floating shelf in a rental without drilling?
Only lightweight adhesive shelves, and only for light items like syrup bottles — a few pounds at most. Anything heavier belongs on a leaning shelf, cart, or baker’s rack. If a shelf needs to hold your espresso machine, it needs furniture, not adhesive.
Will Command strips damage my apartment walls?
Usually not — if you follow the instructions: clean with alcohol, press firmly, wait an hour before hanging, and remove by stretching the tab slowly along the wall. The main risk is cheap flat-finish paint, which can peel regardless. Test a hidden spot first.
What’s the best coffee bar setup for a tiny rental kitchen?
A three-tier rolling cart. It’s the smallest real coffee bar you can build — about 17 inches wide — it holds a brewer, mugs, and supplies, and it rolls into a closet when you need the counter space. Our small kitchen coffee bar ideas have more tiny-space layouts.
Can I hang things on my kitchen cabinet doors?
With over-cabinet hooks, yes — no screws needed. Keep items light (mugs, towels, small baskets), add felt pads to prevent scuffing, and don’t overload the hinges. Screwing hooks into cabinet doors is still a no.
How do I hide coffee bar cords in a rental?
Adhesive cable clips route cords along shelf edges and cart legs, and they peel off cleanly. For a bundle of cords, a small adhesive cord-management box behind the cart works. Avoid drilling cord grommets into countertops — that’s a permanent modification.
Conclusion
Your lease doesn’t have to mean a boring coffee routine. A rolling cart or leaning shelf, a row of Command hooks, a warm LED strip — that’s a coffee bar that rivals any homeowner’s setup, built for under $100, and every piece of it moves with you to the next place. Start with one idea this weekend (the cart is the easiest win), style it with a tray and a plant, and take that setup photo.
Pin this guide for your next apartment — and follow Brew & Beam for more renter-friendly home café ideas!
Keep Brewing
- Small Kitchen Coffee Bar Ideas: 15 Setups That Actually Fit
- Coffee Bar Organization Ideas for Small Spaces
- Coffee Corner Decor Ideas: Cozy Home Café Vibes on a Budget